Loop the Lab
A Mechanics Lab Using Hot Wheels® Cars
Dave Van Domelen, The Ohio State University
Adapted from talk GD6 at the AAPT National Meeting in Denver, August 16,
1997
Supported by NSF Grants DUE9396205 and GER9553460
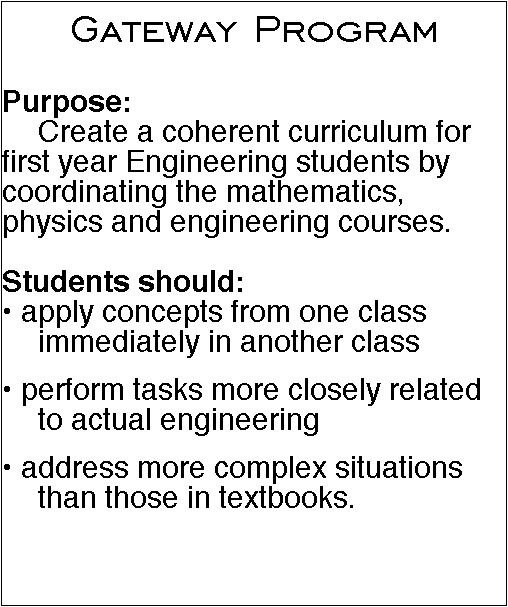
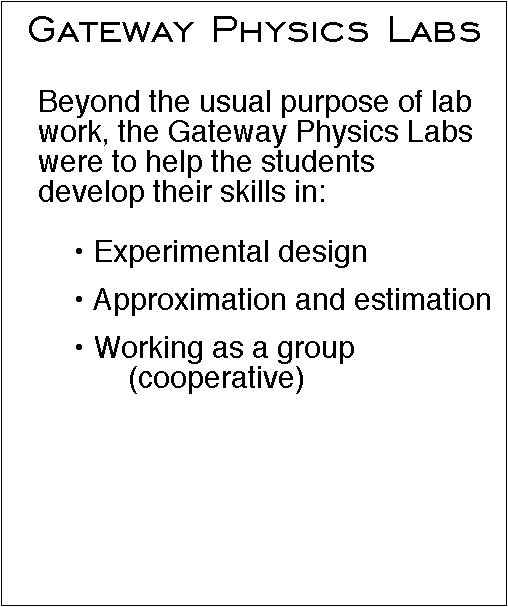
Background
As part of the Gateway
Project at The Ohio State University, I designed a course of mechanics
labs to helps students strengthen their abilities in the following areas:
- Experimental design
- Estimation/Approximation
- Cooperative group work
After investigating several options, I settled on a course mainly using Hot
Wheels® toys, rulers and timers. No computers or sophisticated measuring
equipment. The idea behind this was twofold: help students become
comfortable using less than optimal data, and give them opportunities to find
ways around deficiencies in their measuring devices.
The students did not have a lab manual for this course, rather they were
given a task or tasks to perform using the available equipment, and were
responsible for designing their own experiments. Over the course of the term
they were slowly introduced to the various elements of the lab, often finding
that seemingly trivial tasks required a great deal of thought on their
parts. By the eighth week of the quarter, they were comfortable enough with
the format of the lab that they had little trouble with the loop lab
described below.
Before presenting the lab, it's worth noting that the TA was very active in
the course of this class, shuttling from group to group to engage them in
Socratic dialogue and draw out concepts the students were struggling with.
The lack of a lab manual simply recognizes that there are so many different
questions the students might have that a book trying to cover them would be
unwieldy, especially if written in such a way as to actively engage the
students. Instead, the TAs cover questions as they arise.
The Lab: Energy in a Vertical Loop
Equipment
Per group:
- 1 - Hot Wheels® car, unaltered
- 1 - Hot Wheels® car, with mass added to make the car at least 50g.
This car must run smoothly through a loop, which you can test by holding a
loop upside down and placing the car in it. Cars which slide on their
bumpers are not acceptable. Convertibles are preferred, since it's easier to
add mass to them.
- 1 - Hot Wheels® loop (available in "Loop Packs" or as part of other
sets)
- 1 - Hot Wheels® rubber-band-based car launcher (available in "Launcher
Packs" or as part of other sets)
- Hot Wheels® track, approximately 1.5 meters (available in "Starter
Packs" or as part of other sets).
- Measuring Equipment - rulers, balances (one balance for the entire class
should suffice), digital timers.
- Miscellaneous Equipment - masking tape (to secure the setup), pieces of
cardboard (optional, various uses possible depending on the student designs),
spare rubber bands for the launchers.
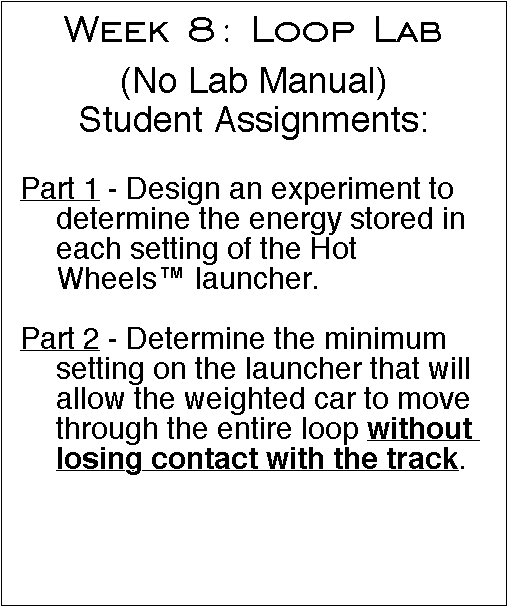
Tasks
- A) Find energy of rubber band car-launcher at all four settings.
- B) Determine the minimum launcher setting which will allow the car with
extra mass to make it through the loop without losing contact with the
track.
Procedure
Part A
Students were rather resourceful in designing experiments to determine the
energy levels of the launcher, with designs falling into four main
categories:
- Launch straight up. Change in height was used to find change in
gravitational potential energy, which was then set equal to the spring
potential energy of that setting. Several groups first got a rough estimate
by watching the car fly up past a ruler, then ran a second trial while
holding a piece of paper or cardboard at the previously observed level. If
the car hit the cardboard, it was raised slightly and another launch made.
- Launch up steep incline. A piece of track was taped to a long ruler and
placed at a steep angle. Students had to account for friction turning some
of the initial energy to heat, but this method was less "messy" than the
first.
- Ballistic I. The launcher was placed at the edge of the table at a 45
degree angle, and the landing point of the car measured. Using ballistics
equations, the group determined the launch velocity and hence the initial
kinetic energy. This kinetic energy was set equal to the initial spring
potential energy of the launcher setting.
- Ballistic II. Cars were simply shot off the edge of the lab table.
Given their initial height, the time to fall to the floor could be
calculated. This time was then combined with the horizontal distance
traveled to determine initial speed, and hence kinetic energy.
Once the design was approved, the students performed their experiments and
determined the energies. Typical results were on the order of .01 Joules.
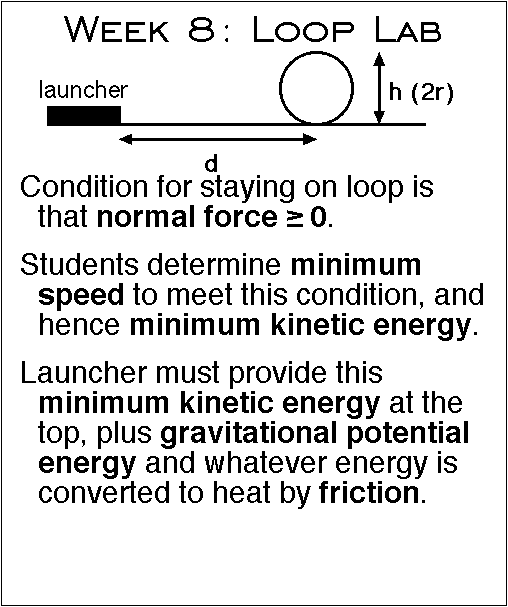
Part B
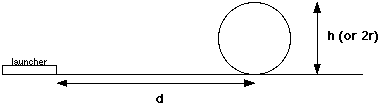 Students were told to construct the track shown above, using about a meter of
track between the launcher and the loop. Some groups compensated for the
height of the connection from the launcher to the track by placing the track
(and loop) on a bed of notebooks or cardboard sheets so there would be no
extra change in height.
Students were told to construct the track shown above, using about a meter of
track between the launcher and the loop. Some groups compensated for the
height of the connection from the launcher to the track by placing the track
(and loop) on a bed of notebooks or cardboard sheets so there would be no
extra change in height.
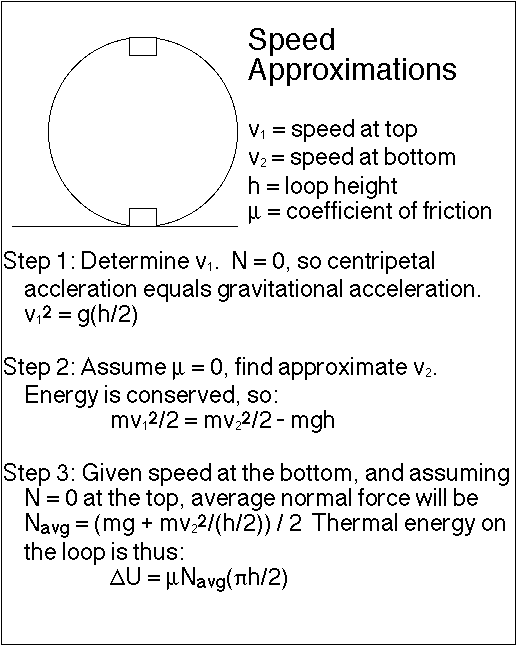
The first thing that students had to realize for this task was that in order
for the car not to lose contact with the track, the normal force had to be
zero or greater, which led to a calculation of the minimum speed required at
the top of the track. This minimum speed could also be converted to a
minimum kinetic energy.
Next, the students needed to determine how much initial kinetic energy would
be converted to other forms, such as gravitational potential and heat.
Energy due to gravitational potential was simply mgh, and
students knew how to account for frictional heat on a flat track from
previous labs. The challenge of this lab was to find a way to approximate
the friction on the loop, since the normal force was very non-constant on
it.
Depending on the capabilities of the students involved, there are several
approximations possible.
- Ignore friction on the loop. It's not a large amount, and there's some
leeway in the launcher settings.
- Assume friction on the loop is the same as it is on the flat section of
the track. This is actually a fairly good approximation, but harder to
justify.
- Approximate the normal force in the loop as a constant, that constant
being the average of the normal force at the top of the loop (zero) and the
bottom (weight plus centripetal acceleration). Students familiar with
integration can be shown how the area under a not-quite-straight line of
postive slope can be approximated by the area under a flat line at the
average point between the ends of the sloped line. To find the normal force
at the bottom, students will have to make further approximations to determine
the speed at the bottom of the loop.
The honors students in the Gateway program proved themselves capable of
working through the third approximation in the Spring 1997 quarter, but the
general population of calculus-based mechanics courses may be more
comfortable with one of the first two schemes.
Results
Once the students made their prediction and could back it up, the car was
launched from the setting they said was the lowest possible. And in every
case, the car did indeed make it through the loop without losing contact.
Then, as a check, the launcher was put at one setting lower, and the car lose
contact with the loop on the way through (note: this is why a car with extra
mass was used. Normal cars will make it through the loop on even the lowest
setting, not allowing for this kind of check). The students were generally
quite pleased with the clear vindication of their work that this lab
provided.
This lab, and indeed the entire course, will be used in the Autumn 1997
quarter at Ohio State for half of a class of calculus-based mechanics, the
other half of the class using Dr. Van Heuvelen's current lab course. The TA
training manual will be made available on the web within the next few months
(I may wait until the quarter is over, to avoid some web-savvy students from
looking up all the answers online).
Transparencies
Here are GIF files of the transparencies I used in the talk.
- Title Page
- Background Page 1
- Background Page 2
- Lab Page 1
- Lab Page 2
- Approximations Page 1
- Approximations Page 2: Not actually used in the
talk, I readied this transparency in the event anyone in the audience had
questions about the approximations.
Back to Education Index.